สำหรับ ฟอร์ด เรนเจอร์ รุ่นปี ค.ศ. 2012-2013-2014-2015
รุ่นปี พ.ศ. 2555-2556-2557-2558
การถอดแผงเครื่องเสียง วิทยุ แผงคอนโซลกลาง
การซ่อม การเปลี่ยน สวิทช์ไฟฉุกเฉิน สวิทช์ล็อคประตู สวิทช์เซ็นทรัลล็อค
Ford Ranger model 2012-2013-2014-2015
Removing the audio, radio, center console, central dashboard
Replacement of radio, audio set, emergency light switch, door lock switch


หา เชือกฟาง ริบบิ้น หรือ แถบผ้าบางๆ สอดใต้แผงคอนโซล
โดยให้ปลายโผล่ออกมา ทั้งด้านซ้ายและขวา สำหรับจับดึง ตามรูปบน
(หาแผ่นพลาสติกบางๆ สอดเข้าไปก่อน แล้วค่อยสอด เชือกฟาง
เข้าไปใต้แผ่นพลาสติก จะช่วยให้สอดได้ง่ายขึ้น)
Place a string, straw, ribbon, or thin strip of cloth under the console panel
with the tip sticking out both the left and right sides for pulling
as shown in the picture above.
(Find a thin plastic sheet Insert it first and then insert the straw rope
under the plastic sheet will make it easier to insert.)

จับปลายเชือกทั้งสองข้างให้แน่น แล้วดึงในแนวนอน ไปทางด้านหลังรถ
แผงคอนโซลจะเปิดออก ดังรูปบน (แต่ยังดึงออกไม่ได้)
Hold the ends of the rope tightly on both sides and then pull horizontally to the back of the car.
The console will open, as shown above (but still cannot be pulled out).

คลิปล็อคตำแหน่งที่ 1-6 ตัว จะหลุดออกจากรู ส่วนตำแหน่ง 7-8 ไม่มีคลิปล็อค
The locking clip 1-6 will come out of the hole, the position 7-8 has no locking clip.


ยังดึงแผงออกไม่ได้ เพราะติดอยู่ที่คลิปบางๆตัวนี้ ทั้ง 2 ข้าง
Still can't pull the panel out because of this thin clip on both sides.

ให้ใช้มือดึงหรือกระชากเบาๆ บริเวณคลิปบาง ทีละข้าง
ทั้งข้างซ้ายและขวา แผงคอนโซล ก็จะหลุดออกมาได้
Use the hand to pull around this clip gently on both the left and right.
Then console panels will come off.

ในการถอดแผงคอนโซลครั้งแรก มีโอกาสสูงมาก
ที่เดือยคลิปล็อคบางๆ 2 ตัวนี้ จะแตกหรือหัก ตามรูปบน
แต่ถึงจะหัก ก็ไม่มีผลอะไร เพราะการยึดแน่น อยู่ที่คลิปล็อคทั้ง 6 ตัว
When removing the console for the first time, these 2 thin locking clips
will be possibly broken as shown in the picture above.
But even if it is broken, it has no effect.
Because of 6 locking clips, the panel could be fastened tight enough.

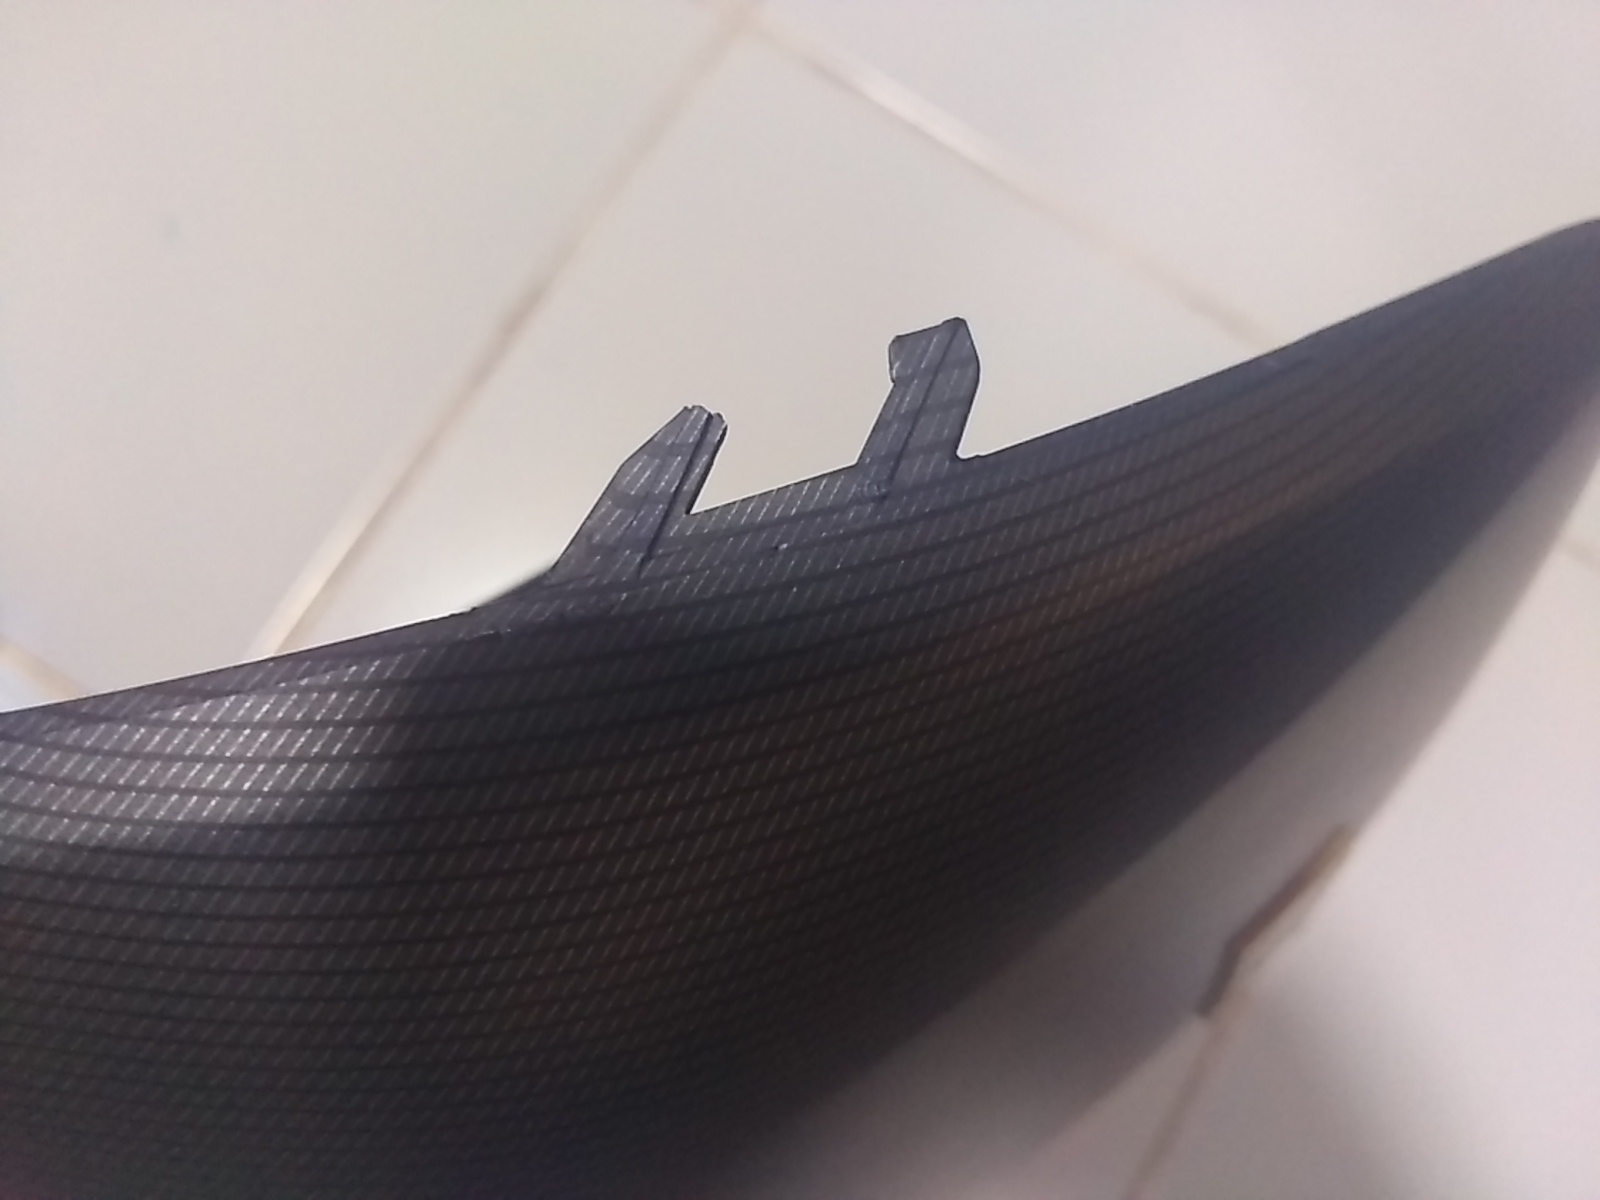
เดือยคลิปล็อคบางๆ แตกหรือหัก จากการดึง ตามรูปบน
แต่ถึงจะหัก ก็ไม่มีผลอะไร เพราะการยึดแน่น อยู่ที่คลิปล็อคทั้ง 6 ตัว
The thin clip lock has been broken as shown in the picture above.
It has no effect because the panel could be fastened tight enough by 6 locking clips.
เดือยคลิปล็อคบางๆ แตกหรือหัก จากการดึง ตามรูปบน
แต่ถึงจะหัก ก็ไม่มีผลอะไร เพราะการยึดแน่น อยู่ที่คลิปล็อคทั้ง 6 ตัว
The thin clip lock has been broken as shown in the picture above.
It has no effect because the panel could be fastened tight enough by 6 locking clips.

ด้านบนสุด เป็นเดือยตรงๆ 3 ตัว สอดเข้ารู ไม่มีลิ่มล็อค
At the top, 3 straight dowels are inserted into the holes without locking the wedge.

ด้านบนสุด เป็นเดือยตรงๆ 3 ตัว สอดเข้ารู ไม่มีลิ่มล็อค
At the top, 3 straight dowels are inserted into the holes without locking the wedge.


ใช้ Torx Screwdriver ไขควงดาวหกแฉก ขันน็อต 4 ตัว เพื่อถอดแผงควบคุมออกมา
Use a Torx screwdriver to loosen the 4 screws then remove the control panel.


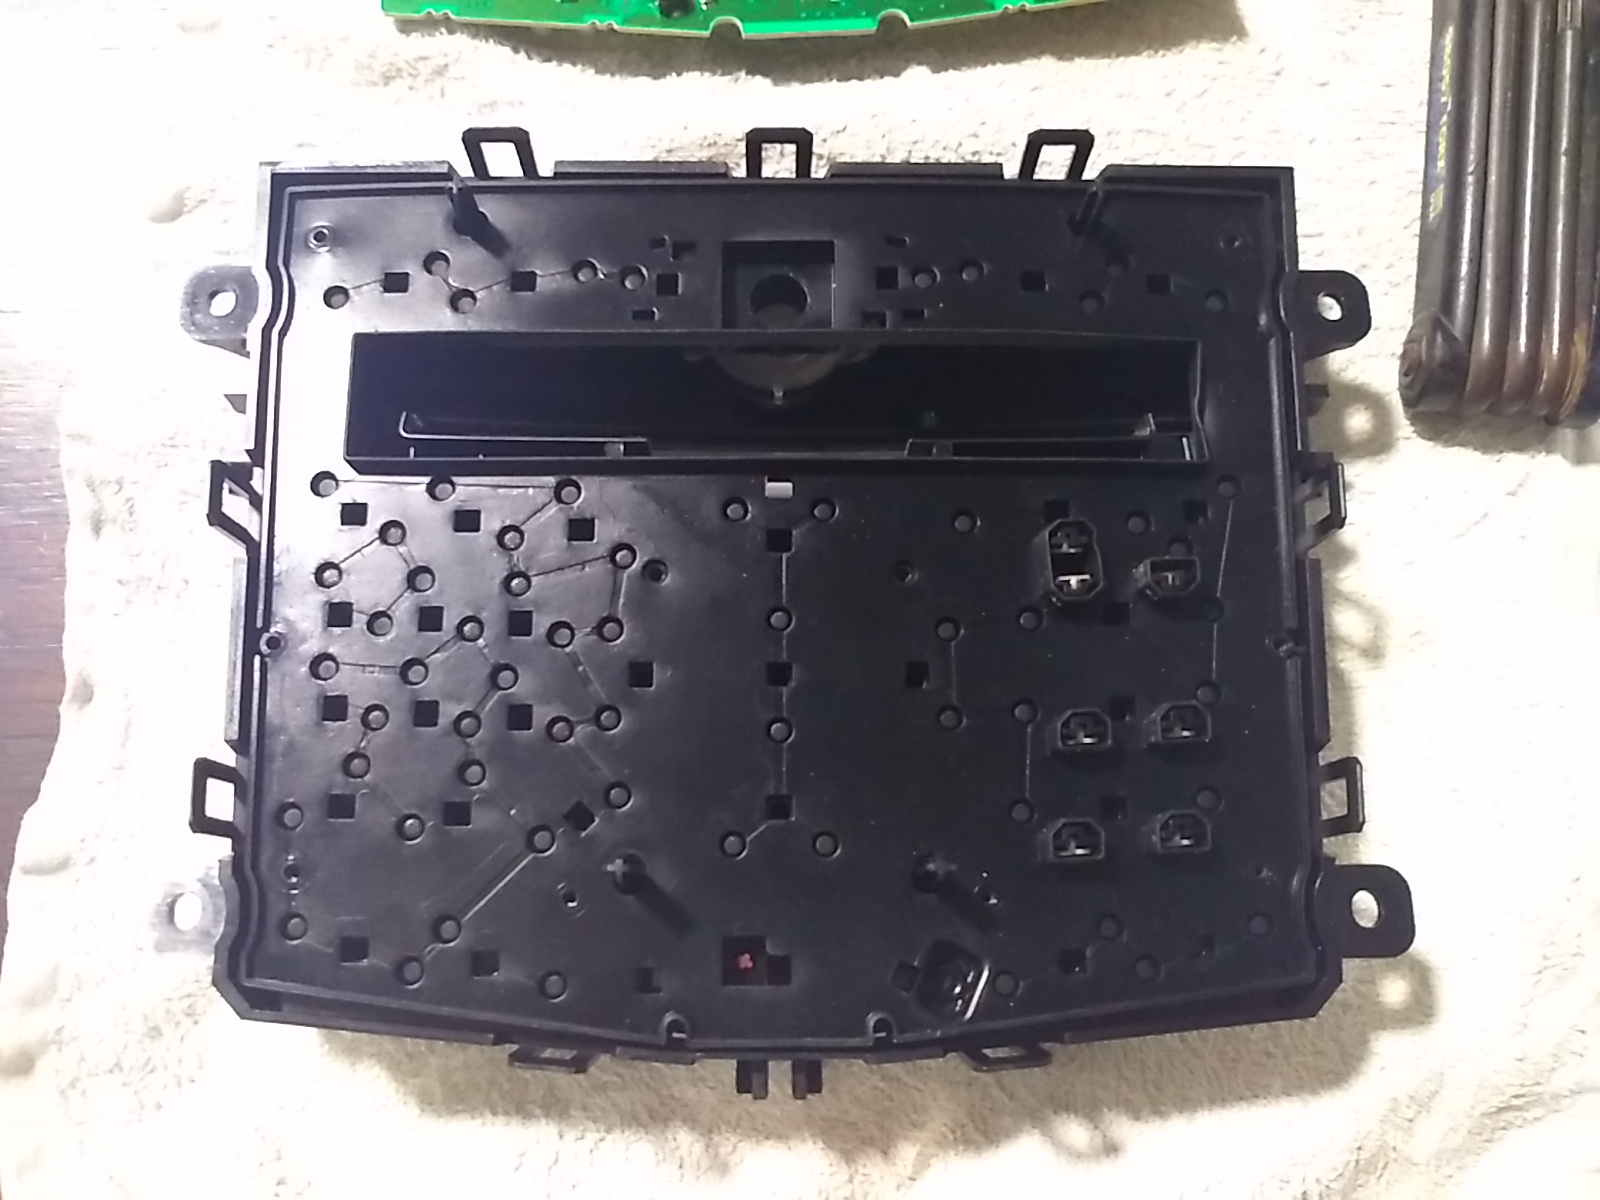
ใช้ Torx Screwdriver ไขควงดาวหกแฉก ขันน็อต 10 ตัว เพื่อถอดฝาครอบพลาสติกออก
Use a Torx screwdriver to loosen the 10 screws then remove the plastic cover.

ง้างตัวล็อคออกเบาๆ (อย่าง้างมาก ระวังหัก) เพื่อยกฝาพลาสติกออก
Pull the lock off gently (not too tugging, be careful to break it) to lift the plastic cover.

ยกฝาพลาสติกออก จะเห็นแผงวงจร ให้ยกแผงวงจรออกมา
Lift the plastic cover then lift the circuit board.
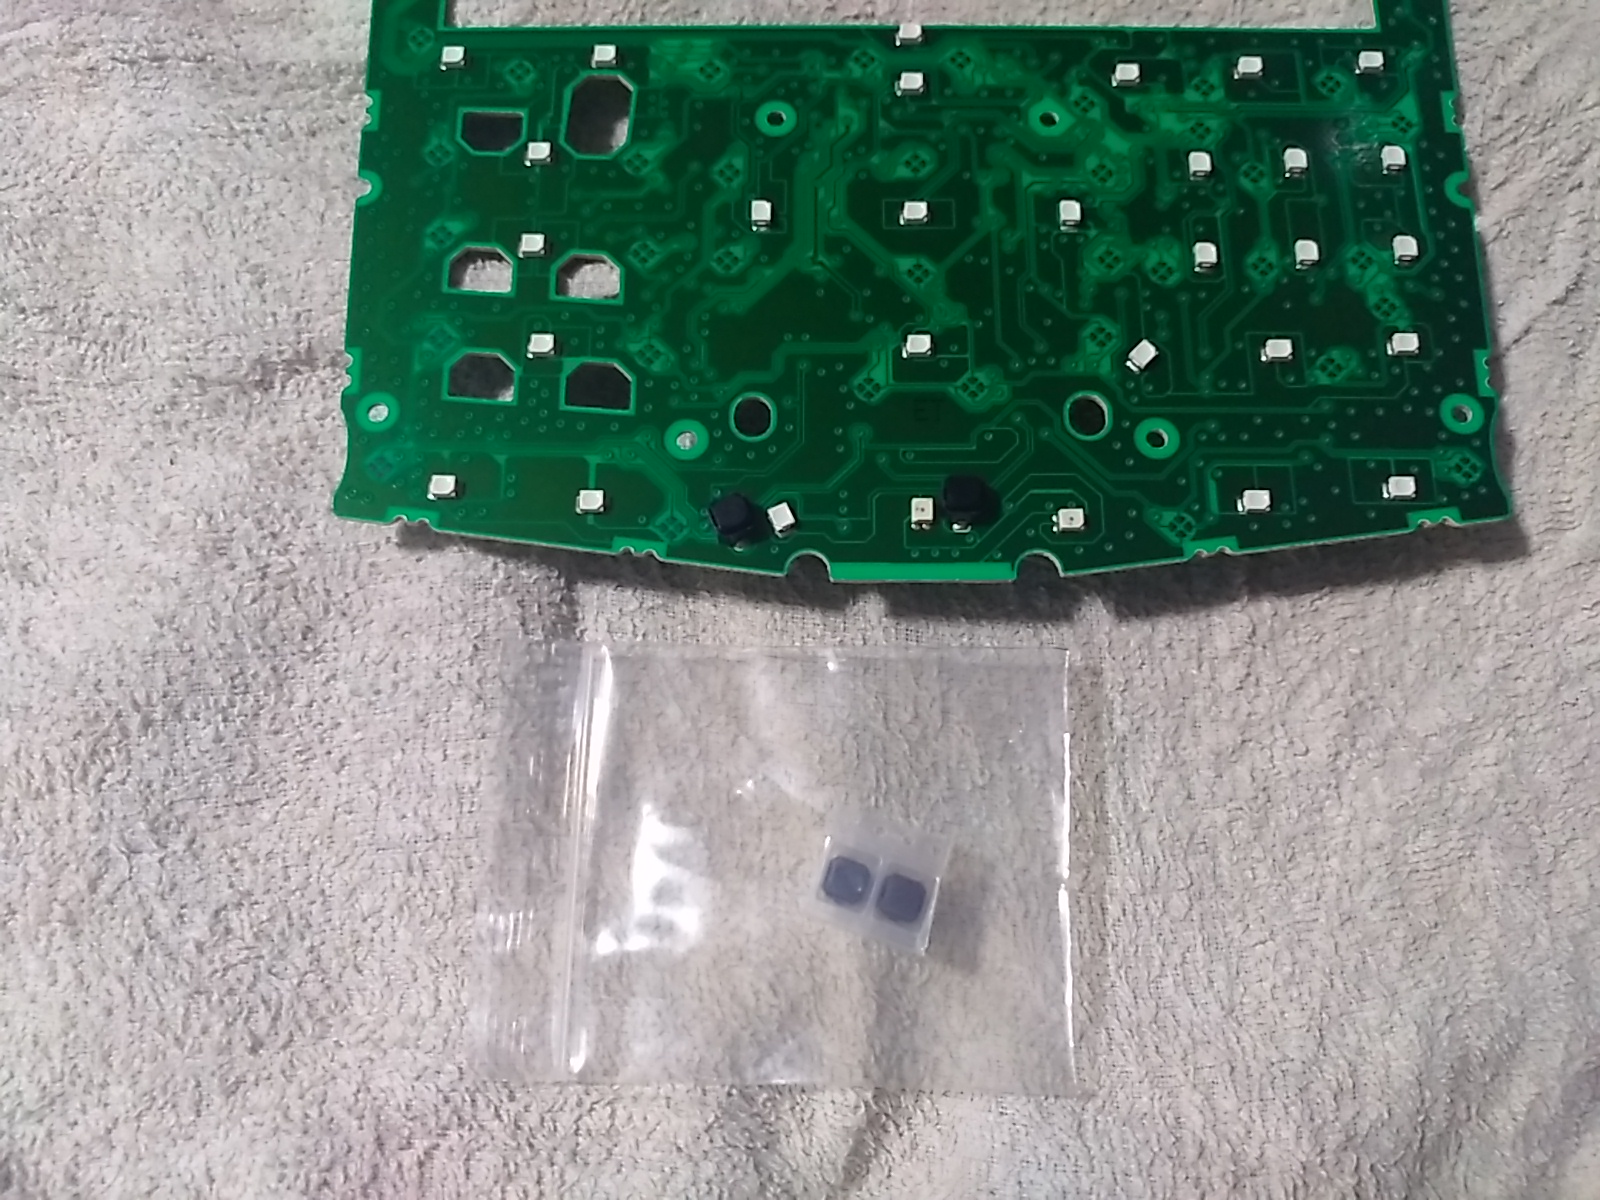
หลังจากยกแผงวงจรออก จะเห็นแผ่นยางรองสีดำ
There is a black rubber pad under the circuit board.

พลิกแผงวงจร เพื่อดูด้านหลัง จะเห็นสวิทช์ 2 ตัว สีดำ อยู่ด้านล่าง
ตัวซ้ายคือ สวิทช์ล็อคประตู ตัวขวาคือ สวิทช์ไฟฉุกเฉิน
Turn the circuit board over to look at the back, you will see two black switches on the bottom.
The left one is the door lock switch, the right one is the emergency light switch.

ตัวซ้ายคือ สวิทช์ล็อคประตู ตัวขวาคือ สวิทช์ไฟฉุกเฉิน
The left one is the door lock switch, the right one is the emergency light switch.
ถ้าสวิทช์เสีย ให้หาซื้อสวิทช์มาเปลี่ยน
If a switch is broken, buy a replacement.

สวิทช์ล็อคประตู สวิทช์ไฟฉุกเฉิน มีขายใน Shopee ราคาไม่กี่สิบบาท
Door lock switch or emergency light switch is available on Shopee for a few tens of bahts.

นำแผงวงจร และ สวิทช์ที่ซื้อมา ไปให้ร้านอะไหล่บ้านหม้อ(รังสิต)
(หรือร้านที่ซ่อมแผงวงจร) ทำการบัดกรี ค่าบริการ จุดละประมาณ 20 บาท
Bring the purchased switches and the circuit board to the soldering shop,
the service fee is about 20 baht per switch.
---------------------------------------------------------------------------